I want to convert 4K videos to iMovie for editing, who can help?
The best possible help for converting the 4K videos to iMovie for editing can be achieved by means of Mac and iOS. Both of these support the 4K videos and are capable of handling the conversion and editing. If you wish to convert any 4K video to iMovie, you simply need to use an iMovie 4K video converter. This converter can also easily compress videos to attain the file size that you choose. You can convert a 4K video to a size of around 1080P/720P and also attain a much smaller size if you wish. Moreover, cropping, additions and removal of content is also possible.
How to Convert 4K UHD Videos to iMovie, Final Cut Pro for Editing
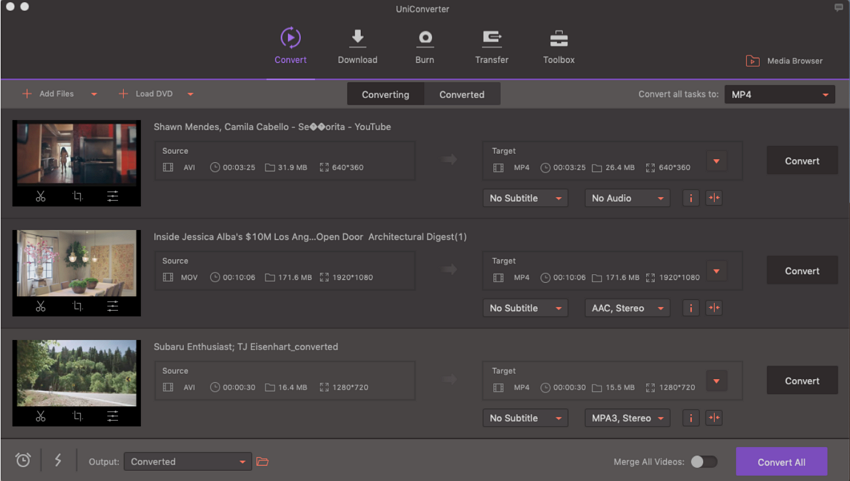
The 4K UHD videos can be converted to iMovie and can also be edited easily. The UniConverter is the best for this purpose. The convertor has a number of special features which enable the users to efficiently edit and convert their videos. Some of the key features of the UniConverter include the following:
Best Video Converter - UniConverter
Get the Best 4K Video Converter:
- Lossless conversion: UniConverter is a converter that allows you to easily convert videos without losing any part of the video.
- Online video conversion: You can convert videos online be it on YouTube, Facebook or any of the other live streaming websites.
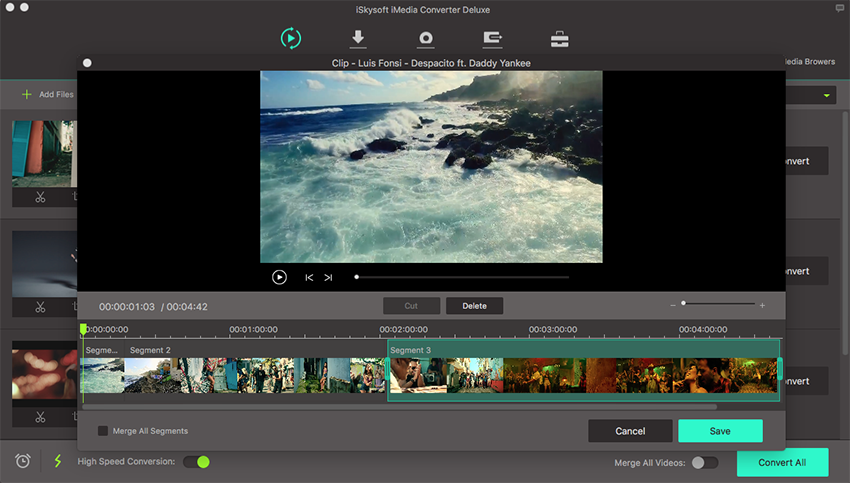
- Built-in video editor: This feature enables you to edit and crop their videos before converting them to any other format.
- Easy transfer: UniConverter helps you easily switch between devices and transfer their videos to mobile phones by means of a USB cable.
- Creating DVD: It is also a great DVD solution as it burns media files to the DVD disc and also to convert videos in any chosen format.
- GIF maker: This feature enables you to create GIFs by editing and selecting the portion of the videos that you wish to have in the GIF.
- Easy to use: All you have to do is drag and drop your files in the UniConverter for converting your audio as well as the video files.
Step-by-step Guide to Convert 4K Videos to Editing Software Supported Format in iSkysoft:
Step 1. Add 4K videos
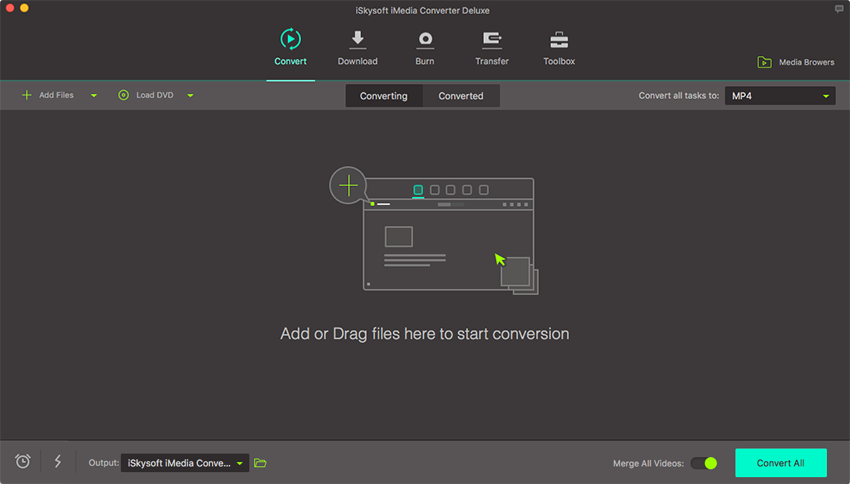
The first and foremost step is to launch the UniConverter and importing the video files. Once the software is open, you can easily upload your video files in it by clicking on the ‘Add Files’ option. Here, you can either choose to add a single file from you device or an entire folder.
Step 2. Select output format
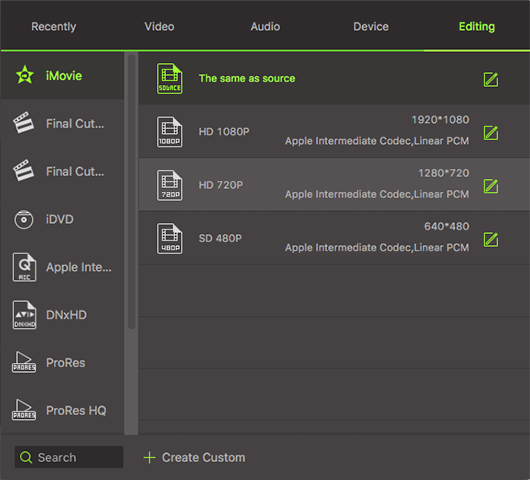
The next step is selecting the format of the output. There are about a total of 150 different video and audio formats that you can select from. Here you can go to the "Editing" option and choose "iMovie" or "Final Cut Pro" as the output format. Along with the selection of the format, you can also select the device that you will be using the file on. This helps in narrowing down your list and providing you with the option of the best possible format for your device. Whichever format you choose, the video will be converted in that format without any loss of data or any change in the resolution. Hence, the integrity of your video will remain intact.
Step 3. Edit 4K videos (Optional)
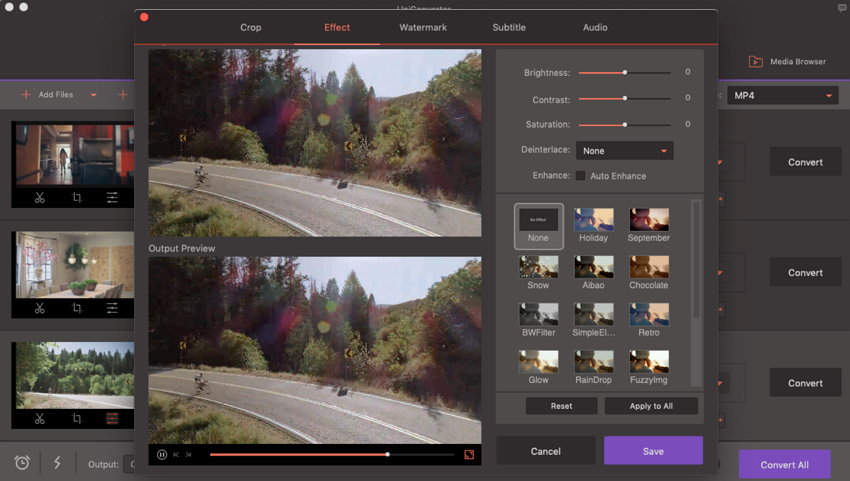
Editing is the next step if you wish to make additional changes to your video. There are a number of options that you can choose from. You have the chance of completely customizing your video as you desire. Adding text, subtitles, watermarks, increasing the brightness of cropping something becomes very easy by the readily available options. All you have to do is click on the editing icon present below the preview window of each of the video that you open.
Step 4. Convert 4K UHD videos for editing
Once you have edited the file, next you have to select the location where you wish to save the edited file. For this, you can check the "Output" option on the main interface. After selecting the location, you have to click on the 'Convert' option to ensure that your video is converted to match the changes that you made.
