I Failed To Watch VR Videos On My Oculus Rift, Who Can Help?
The problem is one of labeling. The reason why your Oculus Rift has failed to pick up any VR content that it is being required to showcase is because the content has been saved under the wrong label in the wrong file. It is common knowledge that 360 and 3D videos for example need to be saved in different folders and in a proper format or the Oculus Rift won’t pick up that it is even there. If you are using Windows the same principle applies and it will pick up from the respective folder there. Your 360 videos should be ideally saved like _360.whateverformat and 3D should be _TB, _BT, _LR, _RL depending on top/bottom 3D and so on. These details are given on the website as well as the manual that comes with the Oculus Rift and a quick check can save you a lot of time when you are trying to play your videos.
- Part 1. How to Shoot and Stitch VR Videos Before Watching on Oculus Rift
- Part 2. How to Convert VR Videos for Playing on Oculus Rift
Part 1. How to Shoot and Stitch VR Videos Before Watching on Oculus Rift
The great thing about Oculus Rift is that it gives you a lot of options when it comes to modes. When you are ready to shoot and have reached the area where you want to make your video and everything is in place you can go ahead and open the app and choose from a variety of modes like panoramic shot, surround shot, animated shot, sports shot, sequence shot and so on. You will need to install these modes if they don’t already exist on your device.
Start by taking a stack of photos so that you are working with a nice wide angle and stitching is easier later on. At this point don’t worry about it looking seamless because once you use a good software, it will stitch up nicely. In the beginning the shots are bound to look a little out of place and roughly taken even if you are trying your best to be steady. Depending largely on the sheer volume of shots you are planning to take you will need to give the Oculus Rift a few minutes to process.
The first step to stitching is picking and choosing the images from the panoramic shot that we want. You can click on the folder and drag and drop to get the right image in front of you. If the images are saved in your device you want to copy them in the relevant Oculus folder which is bound to exist when you downloaded the adjoining app. You have the option to create a sub-folder and name it and this helps if you are going to be doing various shoots and want to be able to differentiate by name so that editing is easier later on.
Next comes the Oculus home app where most of the editing work will be done. Normally a bit of double-checking needs to be done for the folder to appear next to favorites especially if it is not your favorites folder.
Part 2. How to Convert VR Videos for Playing on Oculus Rift
The Oculus Cinema does not have the widest scope when it comes to VR videos but having a converter does help and it can streamline some formats for videos you may have downloaded or home movies you may have shot from other devices. Since the UniConverter offers more than 150 formats to choose from, it is not hard to find the one you are looking for and convert the video file so that it can be viewed easily regardless of the angle it was shot from and the mode it exists in. 3D content has become really popular in the past few months for viewing on the Oculus Rift after its release earlier this year but the programme is such that you need to properly label folders and create separate folders for all kinds of video files before the device actually picks them up.
UniConverter - Video Converter
Get the Best VR Video Converter:
- Any video file can be converted into a more compatible format so that it can be viewed on any VR device (like Oculus Rift) as well as any mobile device.
- You can trim your videos, add subtitles/watermarks/special effects before converting to VR device compatible formats.
- It can act a video downloader to help download 3D videos online.
- You can also burn videos to DVD whenever you want.
- Perfectly compatible with Windows 10/8/7/XP/Vista & macOS 10.12 Sierra or earlier.
If you want to convert a video file and play it on your Oculus Rift, then follow the following simple steps:
Step 1. Import VR Files
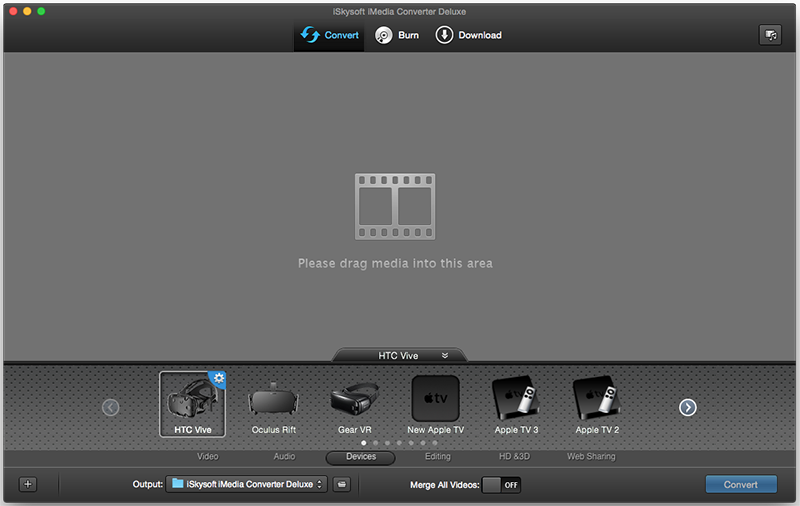
Open the converter software and drag and drop the files you mean to convert that you shot earlier using the Oculus Rift. You may want to click on "Files" to get a better view on your PC of the video clips you want.
Step 2. Select Video Mode And Output Format
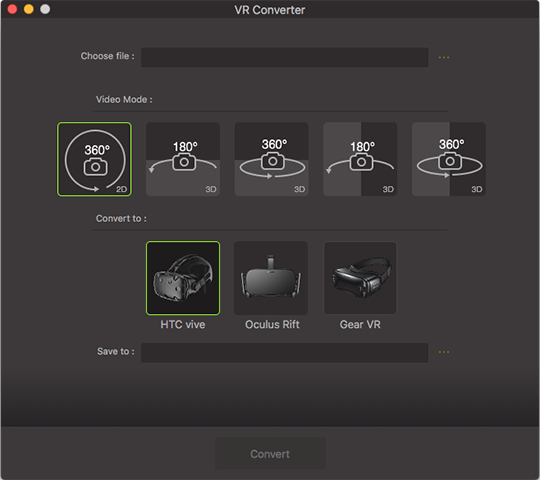
Choose the video mode you want such 2D 360 degree, 3D 180 degree top/bottom, 3D 180 degree left/right, 3D 360 degree top/bottom, 3D 360 degree left/right and then enter your output device for added compatibility such as Oculus Rift in this case or any other device which you are currently using.
Step 3. Edit the Video (Optional)
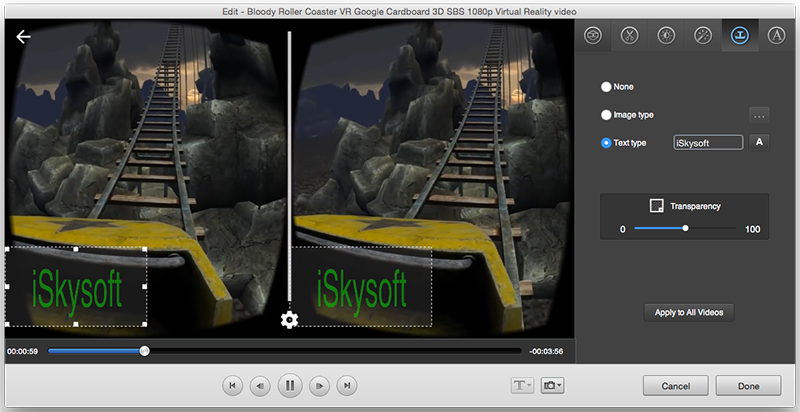
Do basic editing at this point such as adding watermarks, subtitles and special effects, and this can be done by clicking on the "Edit" button on the main page as soon as you open the software.
Step 4. Convert and Watch on Oculus Rift
Select destination file and convert your chosen files with their new header information. It is recommended to not alter this for each individual device such as Oculus Rift.
